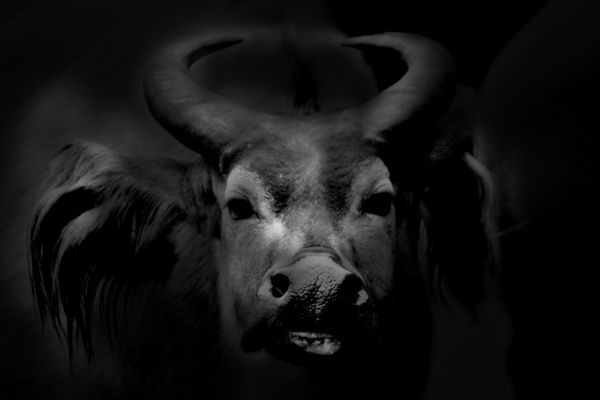
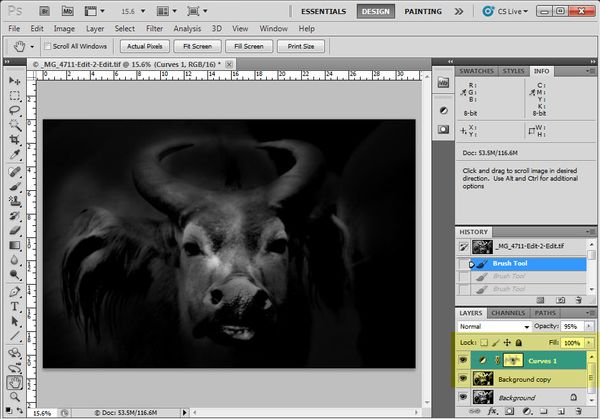
Low key fine art black & white portraiture became particularly popular in the 60’s with photographer’s like David Bailey making it their signature style for a time.
Today, digital post processing techniques make it is easy to reproduce, and can change an ordinary shot into a potentially extraordinary photo. This style works just as well with animals as it does people.
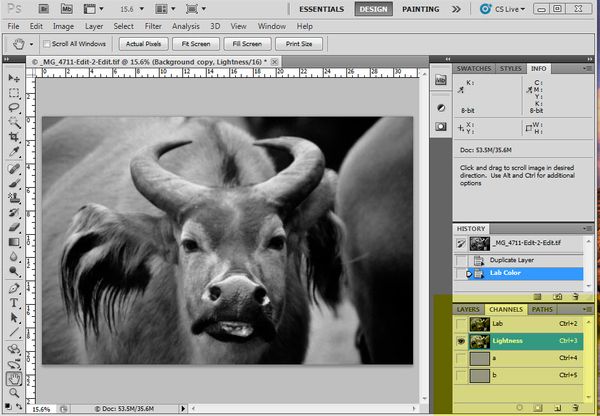
The first stage is to edited your photo as you would normally do. Having adjusted the image to your liking, bring it into in PS and go to Image/Mode/ Lab Colour and convert your colour image into black and white and then look at it in channels under lightness.
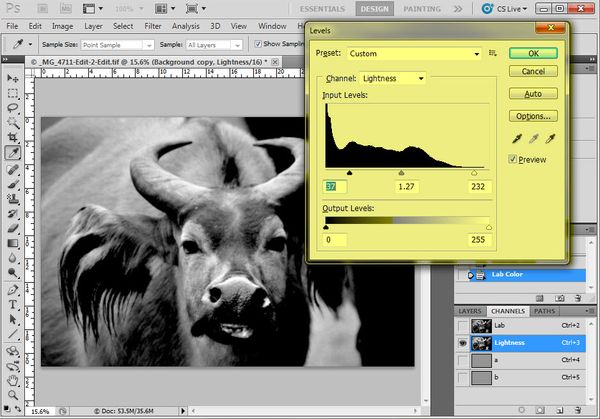
To kick start the low key process, the chances are you will want your photo to become far more dramatic with a darker more moody look, so open up the levels ('Ctrl L' or 'Apple L') and make the blacks blacker and the midtones darker until you you are happy with the look
We now have to dispose of the colour, so go to Image /Mode/Greyscale and a box will pop up asking if you wish to discard other channels; click OK. Having discarded the colour you can convert it back to RGB by going to Image/Mode/RGB It will still remain black & white
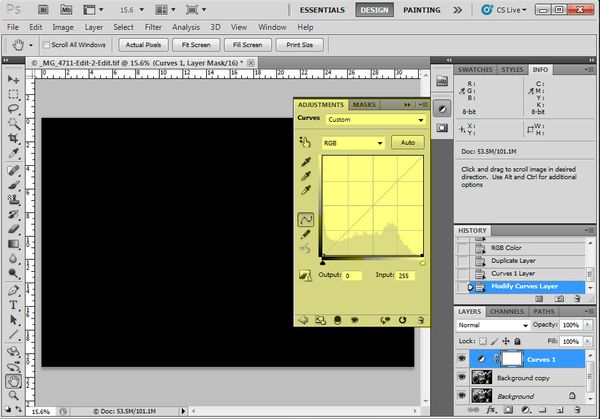
Go back into Layers make a copy of the background layer and make an adjustment layer in curves. Bring the highlights end on the graph from top right down to bottom right so everything goes black.
Make sure you have the adjustment layer box selected then go to the tools palette on the left hand side of the screen and pick the brush tool or hit (B) on your keyboard. With the brush selected go to the top menu bar and working from left to right click on brush size and pick a sufficiently large brush size and make sure the hardness is set to 0%
Next is mode and this should be set to normal.
In the opacity box site the opacity to between 5-15% the lower the better
Start painting in black to reveal the face underneath, giving the picture a heavy vignette appearance. As you move away from the face, reduce the opacity still further so the grading from photo to pure black is very subtle.
If you make a mistake or do go too far change the brush colour to white and start shading in the area again to fine tune your photo. Finally in the layers |pallet go to the Opacity slider and play around with the opacity until you are happy with your finished image.
Save its as a Tiff or PSD file so you keep the layers and save a separate copy as a .jpg ready to be uploaded to the web.
If you would like to know more about Black and White photography why not consider taking our 4 week online Digital Black & White Photography course

