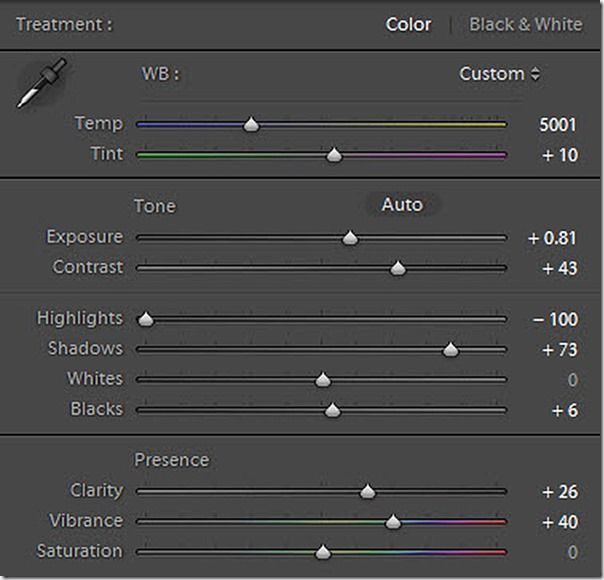
New Basic Panel Sliders (Lightroom)
Do you know the difference between the Exposure vs. Highlights vs. Whites tone sliders in Photoshop and Lightroom?
We use these tone sliders all the time, but few of us really understand the difference between them, as they appear to do very similar things. In this article I will explain what each slider does and when to use them.
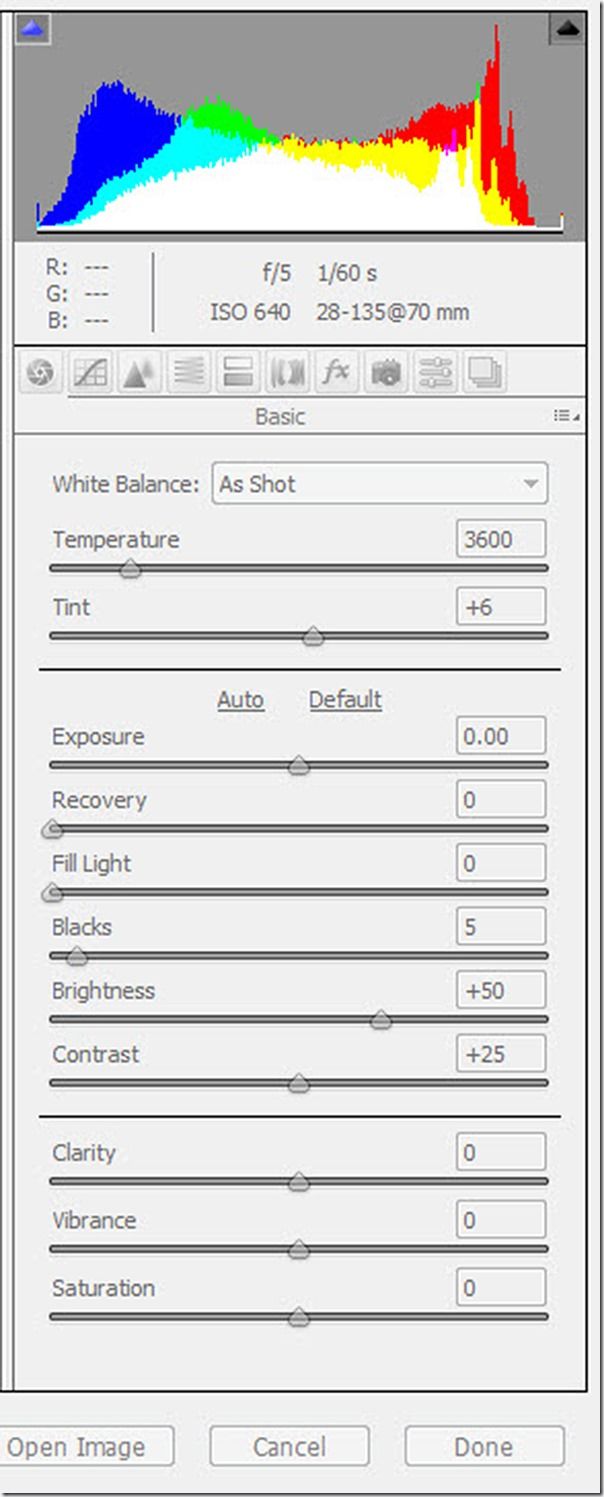
To add to the confusion, the sliders in the ‘Basic’ panel changed in 2012 versions of Lightroom and Photograph with Recovery, Fill Light, and Brightness, having been replaced by Highlight, Shadows and Whites.
In pre 2012 versions, the ‘Recovery’ slider attempted to recover highlight detail lost because of camera overexposure. While ‘Fill Light’ lightens shadow to reveal more detail while maintaining blacks, and ‘Brightness’ adjusted image brightness, mainly affecting midtones.

Old basic panel Sliders (Photoshop)
The new 2012 sliders work in a slightly different way to their old counterparts. They are much more targeted and do not affect other tonal values, other than the one they are specifically design for. The 2012 version the ‘Exposure’ slider is used to fix the mid tones in your image. Adjust the slider until the photo looks good and the image is the desired brightness. Focus on the midtones and don’t worry if there is slight clipping in the highlights as these can be adjusted later.
The new ‘Highlights’ slider is designed to recover detail in the brightest areas of your image. Dragging the slider to the left helps darken highlights and recover “blown out” highlight detail. While dragging to the right helps brighten highlights while minimizing clipping.
The ‘Shadows’ slider is used to recover lost detail in the darker areas of your image. By dragging it to the left, you darken shadows while minimizing clipping and conversely, dragging to the right will brighten shadows and recover shadow details.
The new ‘Whites’ slider is used to set the extreme whites and therefore helps reduce white clipping. Drag to the left to reduce clipping in highlights. Drag to the right to increase brightness.
Now that you understand what each slider does, it is best to start from the top and work down the sliders in order. You can always go back and fine tune afterwards.
Start by using the ‘Exposure’ slider until you are happy with the overall brightness. Adjust the ‘Contrast’ to give your image a little extra punch. Next use the ‘Highlights’ slider to recover detail in the brightest areas of your image, then the ‘Shadows’ slider to recover lost details in the darker area.
Finally use the ‘Whites’ and the ‘Blacks’ sliders to maximise the tonal values in your image.

I like to switch on the clipping indicators in the histogram, then use the ‘Whites’ and ‘Blacks’ slider to stretch the tonal values or recover any blown highlights or shadow detail if required.


